Appearance
These series of steps show how to register and implement a simple Run Configuration. Run Configurations are used to run internal and external processes from within Consulo based products. To get familiar with the concept of a Run Configuration refer to the Run/Debug Configuration section of the Consulo documentation.
Pre-Requirements
Create an empty plugin project as described in Creating a Plugin Project.
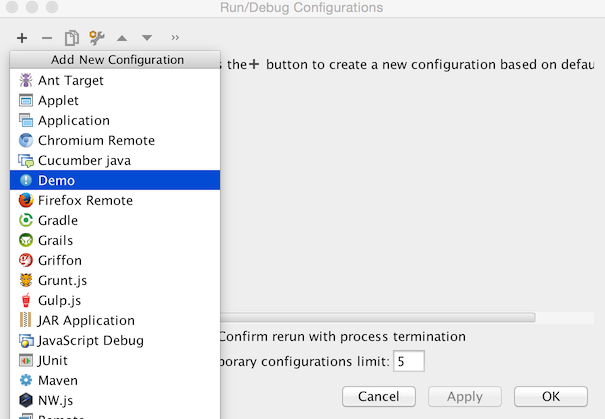
1. Implement ConfigurationType
Implement the ConfigurationType interface. In Consulo, ConfigurationType is annotated with @ExtensionAPI(ComponentScope.APPLICATION), so implementations are registered using the @ExtensionImpl annotation instead of XML.
java
@ExtensionImpl
public class DemoRunConfigurationType implements ConfigurationType {
    @Override
    public String getDisplayName() {
        return "Demo";
    }

    @Override
    public String getConfigurationTypeDescription() {
        return "Demo Run Configuration Type";
    }

    @Override
    public Icon getIcon() {
        return AllIcons.General.Information;
    }

    @NotNull
    @Override
    public String getId() {
        return "DemoRunConfiguration";
    }

    @Override
    public ConfigurationFactory[] getConfigurationFactories() {
        return new ConfigurationFactory[]{new DemoConfigurationFactory(this)};
    }
}
2. Implement a ConfigurationFactory
Implement a new ConfigurationFactory through which custom run configurations will be created.
java
public class DemoConfigurationFactory extends ConfigurationFactory {
    private static final String FACTORY_NAME = "Demo configuration factory";

    protected DemoConfigurationFactory(ConfigurationType type) {
        super(type);
    }

    @Override
    public RunConfiguration createTemplateConfiguration(Project project) {
        return new DemoRunConfiguration(project, this, "Demo");
    }

    @Override
    public String getName() {
        return FACTORY_NAME;
    }
}
3. Implement a Run Configuration
To make your changes visible from the UI, implement a new Run Configuration.
Note: In most of the cases you can derive a custom Run Configuration class from the RunConfigurationBase. If you need to implement specific settings externalization rules and I/O behaviour, use RunConfiguration interface.
java
public class DemoRunConfiguration extends RunConfigurationBase {
protected DemoRunConfiguration(Project project, ConfigurationFactory factory, String name) {
super(project, factory, name);
}
@NotNull
@Override
public SettingsEditor<? extends RunConfiguration> getConfigurationEditor() {
return new DemoSettingsEditor();
}
@Override
public void checkConfiguration() throws RuntimeConfigurationException {
}
@Nullable
@Override
public RunProfileState getState(@NotNull Executor executor, @NotNull ExecutionEnvironment executionEnvironment) throws ExecutionException {
return null;
}
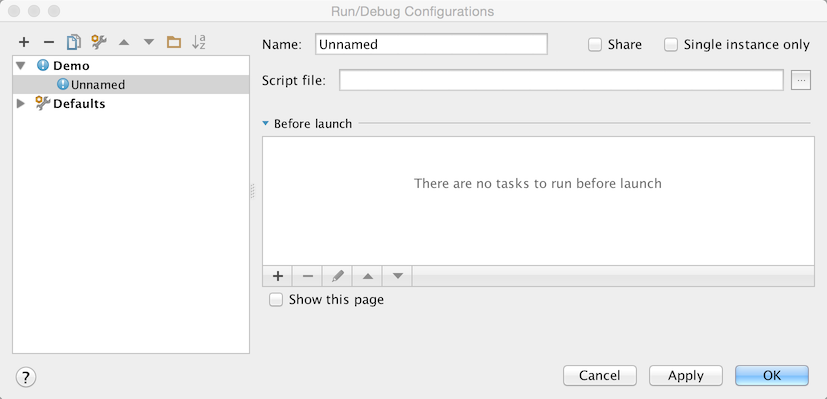
}4. Create and Implement Run Configuration UI Form
Make sure UI Designer plugin is enabled.
Create a new UI form that defines, how an inner part of the new Run Configuration should look like.
Default Run Configuration will be looking like this:
5. Bind the UI Form
The UI Form should be bound with a Java class responsible for handling UI components logic.
java
public class DemoSettingsEditor extends SettingsEditor<DemoRunConfiguration> {
    private JPanel myPanel;
    private LabeledComponent<ComponentWithBrowseButton> myMainClass;

    @Override
    protected void resetEditorFrom(DemoRunConfiguration demoRunConfiguration) {

    }

    @Override
    protected void applyEditorTo(DemoRunConfiguration demoRunConfiguration) throws ConfigurationException {

    }

    @NotNull
    @Override
    protected JComponent createEditor() {
        return myPanel;
    }

    private void createUIComponents() {
        myMainClass = new LabeledComponent<ComponentWithBrowseButton>();
        myMainClass.setComponent(new TextFieldWithBrowseButton());
    }
}
6. Compile and Run the Plugin
Refer to Running and Debugging a Plugin.
After going through the steps described above you can create a custom Run Configuration from your plugin.